If you have reached at our page then it might be possible that you have accidentally lost important pictures from Olympus OM-D E-M10 Mark III-S Camera. No need to worry now because you reached at perfect destination. This article contains detailed information about Olympus OM-D E-M10 Mark III-S Camera, causes of data loss and the best ways to restore the files quickly. So, what are you thinking for, try to read the instructions carefully and follow them in step-by-step manner.
About Olympus OM-D E-M10 Mark III-S Camera:
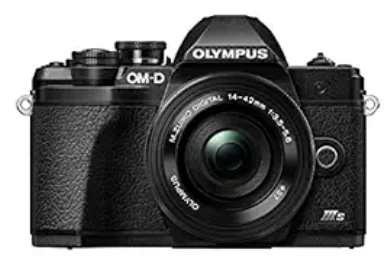
Olympus OM-D E-M10 Mark III-S Camera is one of the advanced digital camera which comes with 20.4MP resolution with Live MOST sensor and TruePic VIII image processor. It comes with 5-acis sensor shift Image stabilization feature which improves the picture quality. Additionally, you will get 121-Point Al cross type phase detection AF. Moreover, it allows the users to capture high quality 4K ultra HD videos. You will also get 3 inches of OLED LCD screen which allows the users to preview the files. Additionally, it uses 1 lithium ion battery for providing longer backup.
However, the worst situation occurs when you accidentally loses the pictures from Olympus OM-D E-M10 Mark III-S Camera. If you want to regain the deleted or corrupted pictures then we suggest you to use Olympus Photo Recovery Software. It is one of the advanced tool which is capable to perform deep scanning in the system to restore deleted or corrupted pictures quickly. This tool will not change the files quality and allows the users to save them to desired location. So, download it now.


![]()
Possible Reasons for Photo Loss Situations from Olympus OM-D E-M10 Mark III-S Camera:
Mostly, photos gets damaged or corrupted due to human errors. There are many more reasons which are responsible for the inaccessibility of the photos. The important points are mentioned below:-
Malware Attack: The most common reason for the damage of photos is malware or spyware attack. Once the threat infiltrate in the device, you will not be able to view such pictures.
Accidental Pressing of Shift + Del keys: Sometimes, user accidentally deletes any important photo while removing the unwanted files.
Mishandling of camera: Using the digital camera or device in very indecent way can also result to damage or corruption of important photos.
Ejecting Memory Card: Pulling out the memory or SD card while using can also harm your important photos.
Low battery: Capturing photos in low battery would also damage the images or photos stored in the memory card.
Error Messages After Damage of Photos:-
Once the file gets damaged or corrupted, it will start to generate floods of error messages when you will try to access them. These alerts are extremely annoying for the users. The most common error messages are mentioned below:-
- Unable to open the selected files.
- Image.png does not exist in the memory.
- Do you want to format the memory card?
- Please insert a disk in removable drive.
- An unknown error occurred while opening the file.
- Unable to complete the operation.
- You are not authorized to perform this activity.
What to do after photo corruption or deletion from Olympus OM-D E-M10 Mark III-S Camera?
You need to know that when any file gets deleted from hard drive then it gets transferred in a hidden location. It is difficult for the users to view such files manually. But it is possible to recover these files with the help of recovery tool if you will follow some precautions which are given below:
- Do not capture any new photo or image.
- Stop using the camera or memory card immediately.
- Do not use the space of deleted photo for any other photo.
![]()
How to Recover Deleted Photos from Olympus OM-D E-M10 Mark III-S Camera?
If you have lost your important photos from the digital camera or memory card then you need to make use of Olympus OM-D E-M10 Mark III-S Camera Recovery Software. It is one of the best software which makes use of powerful algorithms and mechanism to scan the location internally. It has capability to restore all types of deleted, corrupted, severely damaged or even permanently deleted images in just few clicks. This software does not compromise with the quality of the image and carries ability to recover the image without changing its actual size. This software will help the users to recover files from digital camera of different brands, memory cards, Android devices and many more.
Stellar Phoenix Olympus OM-D E-M10 Mark III-S Camera Recovery Tool supports Graphical User Interface which can be easily understood by the novice users also. You don’t need to have technical knowledge in order to use the software as wit guides the users by providing step-by-step instructions. Moreover, it comes with several advanced features which make it best from other available tools. Additionally, it is compatible with different versions of Windows as well as Mac operating system. The trial version of the software is also available for the users which you can download the check its working efficiency. But the demo version comes with a limitation i.e. it will also display the preview of the recovered files. If you want to save the repaired photos then you need to purchase the full version of the software.
Minimum System Requirements of Olympus OM-D E-M10 Mark III-S Camera Recovery Tool:-
- Processor: Pentium Class
- Supported Operating System: Windows XP, Vista, 7, 8 and 10
- Memory: 1 GB of RAM
- Hard Disk: Free space of 100 MB
- Supported Language: English, French, German, Italian, Spanish and Dutch
![]()
Features of Olympus OM-D E-M10 Mark III-S Camera Recovery Software:-
Restores Deleted Photos: It helps the users to recover deleted photos from different devices including flash drive, memory cards, hard drives, digital camera etc. It also supports recovery from NTFS, FAT32 and ExFAT.
Recover lost audio and video files: This powerful tool have capability to recover all formats of deleted audio as well as video files in just few minutes.
Supports file preview option: The latest version of the tool display preview of the recovered files in three types.
Easy-to-use Interface: It supports extremely simple interface which can be used by non-technical users also.
Recover media files more than 2TB storage: This tool will also work smoothly when you will try to recover file with huge size of 2 TB and more.
Supports Unicode file recovery: You can make use of Unicode file recovery feature to restore different file formats v7.0 of the software.
Restores deleted files from specific region: Using this tool, you can easily scan a selected location of the hard drive or volume. Even more, you can also choose desired types of file which saves the time from full scanning.
User Guide of Olympus OM-D E-M10 Mark III-S Camera Recovery Software: For Windows Users
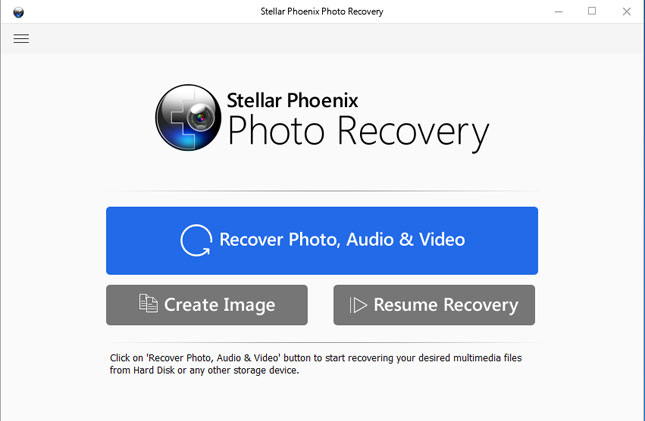
Step 1: After successful installation of the software, the first screen will appear which is given below. You need to click on “Recover photo, audio & video” to recover the deleted or damaged files.
Step 2: A list of hard drives will appear on the screen. You need to select the desired location to perform scanning process.

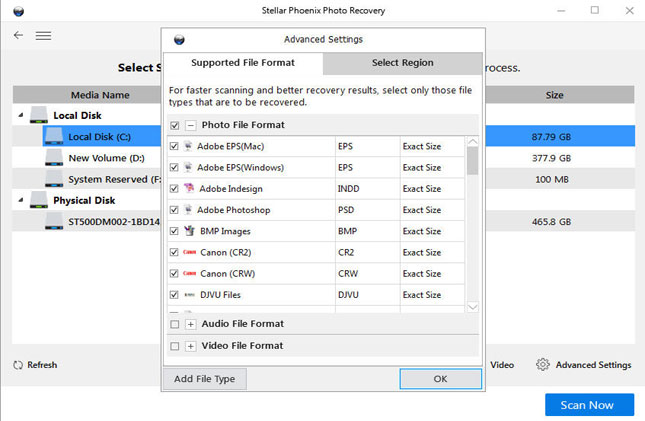
Step 3: You can also choose any desired file format by clicking on Advanced Settings button and click on Scan button.
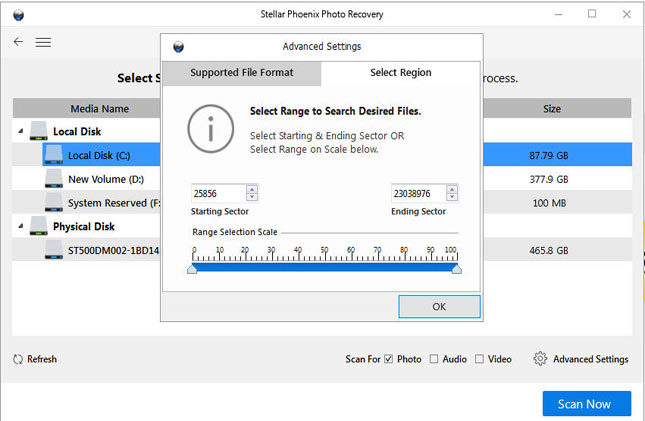
Step 4: From the Advanced Settings, you can also choose starting and ending sector of the scanning.
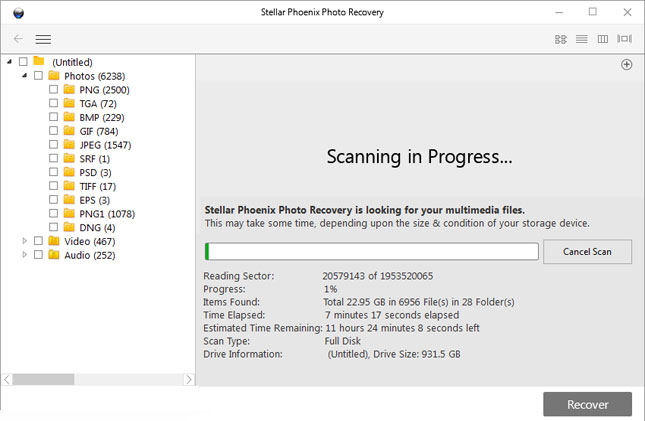
Step 5: You will detect scanning in progress screen while the tool will search for all the deleted media files.
Step 6: After successful scanning, it will display the list of files which can be recovered by the software. You can also change the view from list to icons.
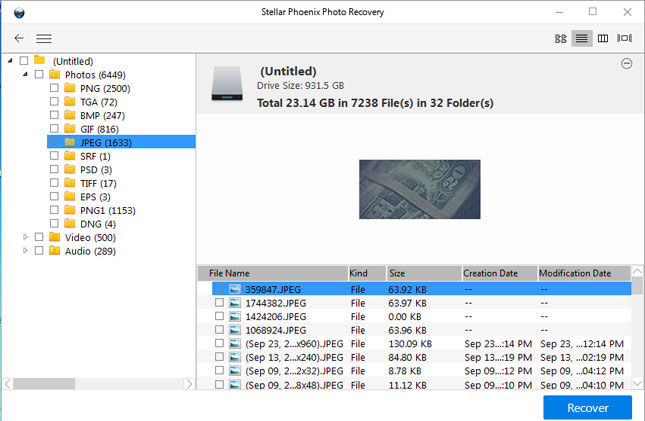
Step 7: It also allow the users to view the files in columns.
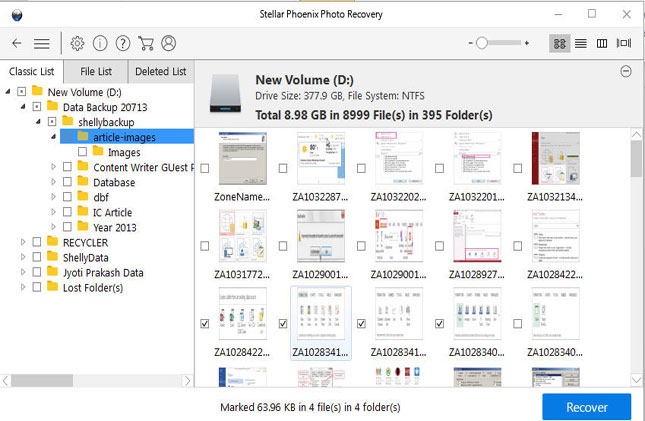
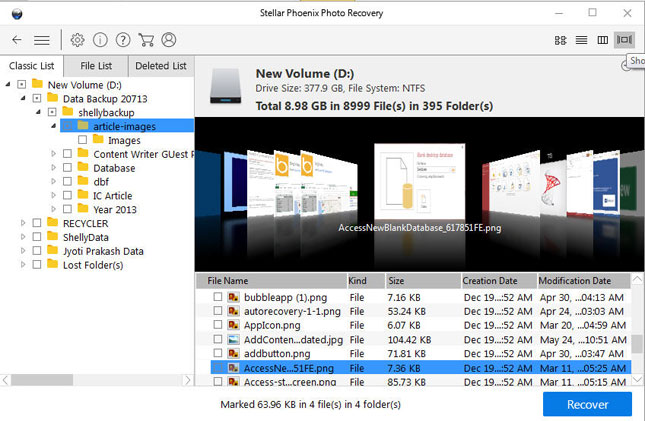
Step 8: Finally, you need to select the files and click on Recover button to get them back.
User Guide of Olympus OM-D E-M10 Mark III-S Camera Recovery Tool: For Mac Users
Step 1: Launch the software after installing it in the PC. In the first screen, you need to click on “Recover Photo, Audio & Video” button to begin the scanning.

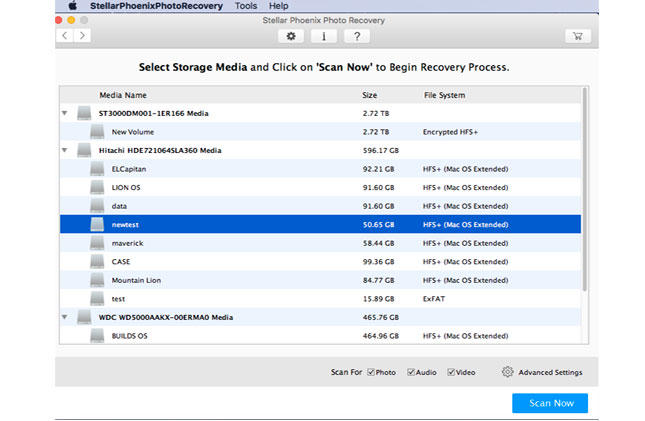
Step 2: Choose the drive or storage media from where you want to perform recovery and click on “Scan Now” button.
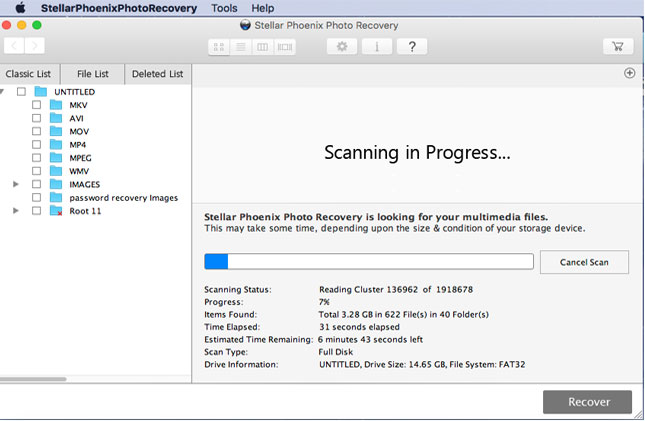
Step 3: The software will start to perform searching process using its powerful algorithm.
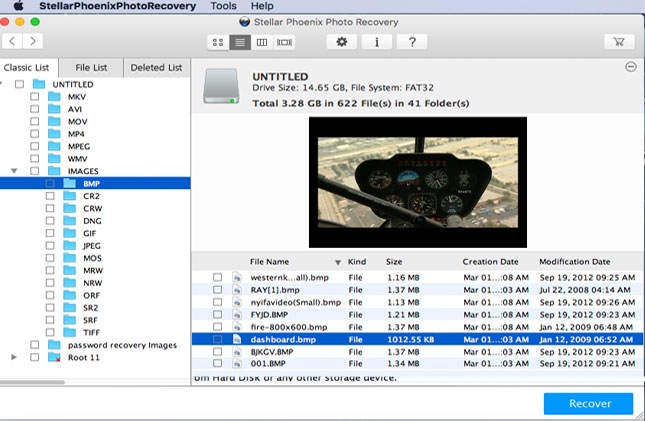
Step 4: It will display a list of all the scanned files detected from hard drive, volume, storage media etc. You need to choose your desired file and click on “Recover” button.
![]()